I am very excited to be participating in this Kiwi Lane Blog Hop!
They ask for volunteers a few months ago and so I sent my name in all the months were full so I was added to the December Blog Hop. Yeah I know I am crazy doing this in the busiest month of the year in my busiest week of the month. I have a quilting software class I teach every first Saturday of the month. Wait until you see what my project turned out to be and you will know I am certifiably crazy.
Be sure to read until the end of the post to find the links to the other Blog Hop participants and the find the wonderful give away for a $25 gift certificate to Kiwi Lane. Just in time for Christmas.
As you know I have been using Kiwi Lane Design Templates since April and I really enjoy using the templates and how wonderful they make my pages look. They can also be mixed and matched with other techniques so they are very versatile.
Kiwi Lane sent me the Large Bracket Set to work with. Now this is a set I didn't own and since I don't usually make 12 x 12 pages it really challenged my creativity.
I had one idea and I went with it!
Two page layout with mini pages!
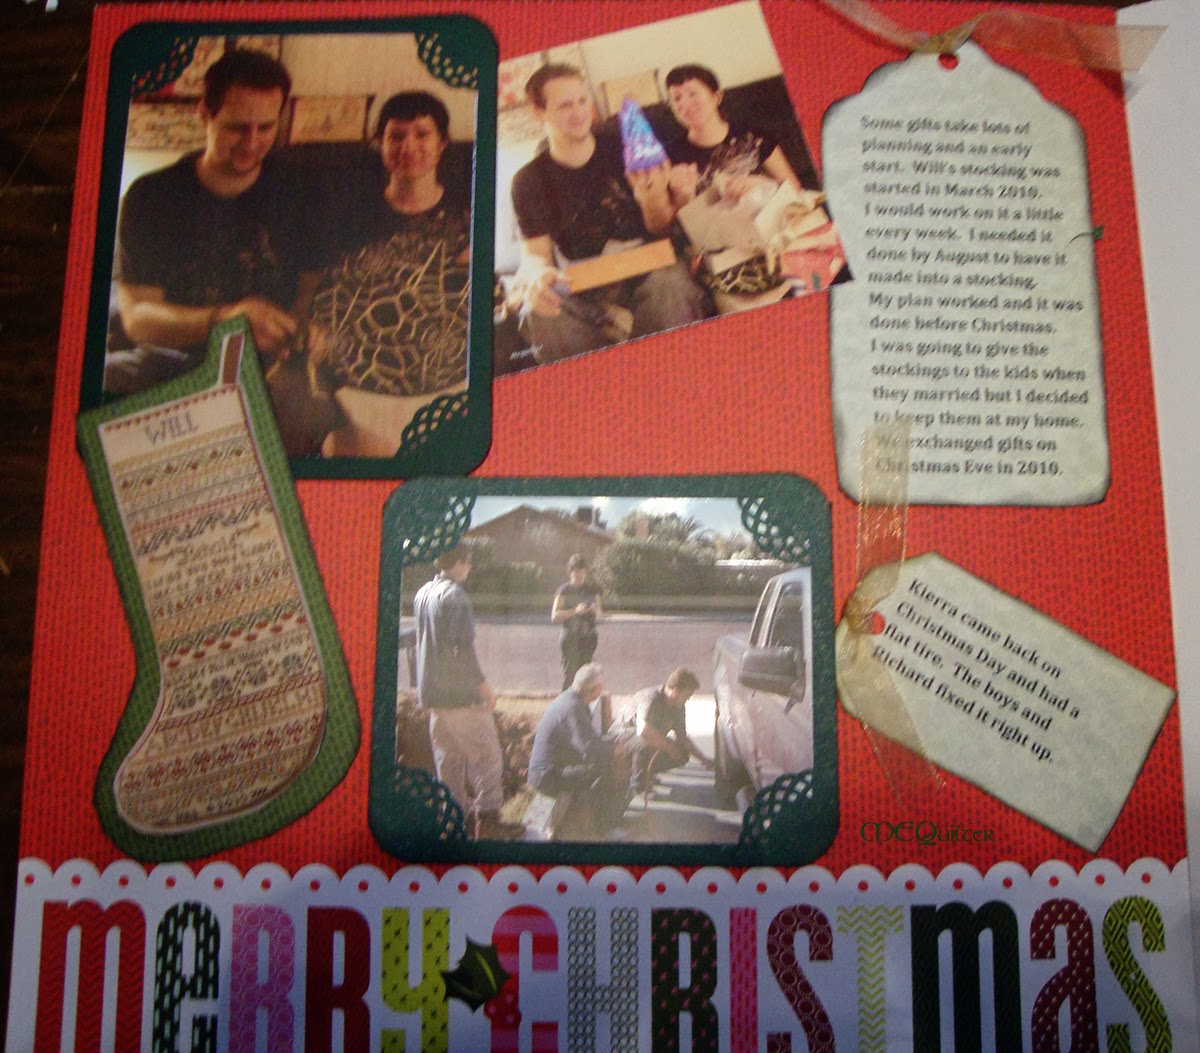
You can double click on the picture to see a larger view. I will do another post where you can see each mini page individually. In this post I want to focus on some techniques and the Blog Hop.
You see when I really go all out; I go all out. Yup that is a two page layout with 6 individual mini pages, 3 on both sides. It holds a total of 18 pictures. There could be more but I ran out of pictures.
I made it to chronicle all the years my daughter and her husband have been together for Christmas.
So anyway!
My first step was to place my Large Brackets on my page. Like so!
Since I don't have photo templates or photo mats templates I placed some pictures to give me an idea of how it would look.
Because I am very visual and hands on I made some plan paper templates just to make sure my ideas would look OK without cutting my good paper. These white papers are the inserts from the sleeve protectors. I am showing them here with color paper between them so they will be more visible.
Once I had my mini pages on my background paper I started adding templates and pictures to the mini pages. I worked on each mini page as it's own page.
I use different design templates for journaling. To make sure the text will fit in the shape I plan to use. I hold the template right over my text on the computer screen. Make sure your view is at 100%. It actually prints just a wee bit smaller than seen on the screen but not enough to be a problem.
So you are wondering how am I going to get these pages in an album. I have a solution for that also. Cut down the outside edge of the sleeve, the edge opposite the spine for this two page layout. You can see me holding it up the sleeve protector below. That journaling card is the same one pictured above.
Then I use a brag to hold the sleeve in place. The brag goes through the front of the sleeve, the background page, the folded over edges of the mini pages and the back of the sleeve. Here is a picture of the back of the sleeve with the brag. If you want to add a page to the back side of this you will need to open the brad to get the new page in and then reuse the brad.
I will do a second post so you can see each mini page.
Here are close ups of the two sides.
 |
| Left Side |
 |
| Right Side |
The Templates I used:
Large Bracket Templates 1, 2, 3
Bracket Template 2
Tiny Bracket Templates 1, 2
Tag Templates, 1,2, 5, 7
Tiny Tags Templates 5, 7
Tiny Holiday Templates 1, 3, 6, 8
Now for the Blog Hop Details
The blog hop will run through 11:59 PM MST on Sunday December 8th. So between now and Sunday visit each of the ten blogs and leave a comment. Enjoy your trip!
A random winner from ONE of the participating blogs (including the Kiwi Lane blog), will be given a $25 gift certificate to the Kiwi Lane Shop, for leaving a comment and will be announced on the Kiwi Lane blog on Thursday, December 12th. I won a gift certificate in the first Blog Hop I did. It was so fun to go shopping.
Here is the blog hop lineup!
- Kiwi Lane http://kiwilane.com/here/blog/
- Mary Hartmann-Bowden http://mequilter.blogspot.com/ You are here!!
- Janie McKissickhttp://www.typicalscrapbboker.com/ Go here next!!
- Carrie Bryant http://carrieshappyscrappin.blogspot.com/
- Amy Berrett http://ladybugsspotblog.blogspot.com/
- Cassandra Henson http://fortheloveofscrap.com
- Carrie McDaniel http://carriedawaywithcrafting.blogspot.com/
- Apryl Hollandhttp://onescrappysoul.blogspot.com/
- Erin Colbyhttp://oursliceofcheese.blogspot.com
- Brenda Smith http://theimperfectscrapper.blogspot.com
Have Fun and Good Luck!!