Showing posts with label Get RR Done. Show all posts

Saturday, November 14, 2015

What I Have Left

The last meeting of the Get RR Done Club was Thursday October 8th.  I didn't go I just had too many things to do on my to do list.  But here is an update on my progress.  
I finished three projects and made progress on three.  I didn't finish all six, but that is OK.  
I finished the Stick Witch, Stick Santa and the machine quilting free motion sampler. 
I finished the Pink Princess top, which was suppose to be quilted and binding on.
I made one block on my Design and Sew Quilt, it was supposed to be quilted and binding on. 
I made one Dear Jane corner and constructed my four borders except for the blank spots. 
I bigger dreams than I had time for.
If I do this again I am going to make my projects smaller, or smaller parts. Like finish blocks.  
Life gets too hectic for me sometimes.

Below are the pictures of the Dear Jane blocks I still have to complete.  I had to put her away again for a short time.  I have class samples to start and finish.  


I can't get these to line up the way I want.  But you get the idea,

Thursday, September 17, 2015

A Dear Jane Corner Completed


And all I can say is whew!!!
It was a doozy!
I took five different times, sitting at the sewing machine and sewing to get it done.  But it is done!
Done is better than perfect.
I traced part of the pattern, so I could paper piece parts of it. 


I made the top center square a little bigger, so the number 2000 would show completely.  It was the only part of the Millennium fabric that was really going to show. 

The four triangles I have left are all going to be complicated also.  Plus one more corner, it has two applique stars on it.  

Unfortunately I have to put her away for awhile.  My next project due for the Get RR Done group is My Design and Sew Quilt.  I would like to have the top done by the next meeting.  I really should have the quilt done for the next quarter of the teaching calendar at the shop, which starts in December because I plan to teach that class again, called EQ Design and Sew.  I teach the students how to design the blocks in EQ, and then they make the blocks.  Students like seeing the end results.  

Yesterday I remade my paper piecing Halloween patterns.  I made the little wall hanging ages ago.  I think the patterns were from Nancy Granny Paper Piecing Patterns.  Of course they don't make them any more, and all my paper piecing programs don't have the blocks I have in my Halloween sampler.  So I drafted them again in EQ7, so I have the patterns for class on Monday. 

Halloween Sampler

I haven't taught paper piecing in a good ten years, if not longer.  The teacher who was teaching at the shop, needs a break.  Actually she was one of my students ages ago, way back when I first taught paper piecing.  

Today I found my old handouts, and boy did I have to update them!  Some of the information is still relevant, and some wasn't.
Since I didn't really want to type the whole thing over.  I set up my Dragon Naturally Speaking program on my computer.  It worked like a charm. 

I was going to use it for this post but it won't work in Blogger.  So I went to word and now it is telling me, my operating system is set up to run this program.
  
Seriously!!  I just finished a 3 page hand out and hour ago.  
Mr. B. upgraded me to Windows 10 and now I can't find the screen capture icon that I used a lot with Windows 8. So I can't take a screen shot of that message to show you
I just found my Snipping tool.  So here is that error message I received. I still can't get Dragon to work.  Grrrr
Plus I just realized I didn't load Snag-it with all my other software.  And I don't have time to go get the external DVD machine.  
He loaded 10 on three other computers, no problems.  Mine it failed five time if not more.  So he ended up setting my computer back to factory settings and I lost all my software.  Luckily he backed up all my files, so those weren't lost. 
Sometimes as much as I love computers I hate them also.
Well I better go, it is time to get the girls from school. 
Happy Stitching!!

Sunday, September 6, 2015

Dear Jane Borders

Well I have been busy sewing between being busy with other stuff, like kids, homework, playing chauffeur, and spending time with Mr. B. who took some time off from works.  So we went on a date to breakfast and a movie. We had two birthday celebrations for Little Bit who turn 10.  I took in a movie with the girls. Plus I taught a four hour class, my Stick Witch class.  Gosh I am making myself tired just listing all this out. 

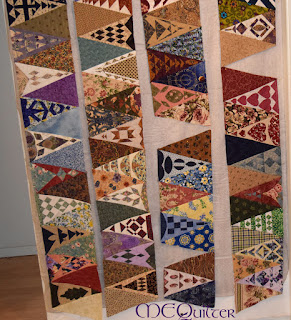
So now all four borders are constructed, minus the four triangles that are missing.  See the white spots below. 
I found out that I last worked on these triangles in 2005, so it has only been 10 years since I last worked on the quilt, instead 12 years. 


It was really fun to go though all the fabrics I had put aside for the plain triangles. Some of the fabrics are Millennium fabrics, I included them, since that was my original plan.  Since these fabrics have been tucked away for ten years, I also cut a small square from each of the fabrics to make Yo-Yos for my Yo-Yo quilt.  See the side bar, Yo-Yo to see old post on the progress of the quilt. 


Close up of the top half of the triangles.


Close up of the bottom half of the triangles. 

Now to go make four triangles and two corners.  I am hoping now that the borders are almost completed I will have more momentum or at least not loose any.

I know why I put it away, I got intimidated by those last four triangles I had to make as well as putting on those borders. 

It feels good to be getting to this point. I want to finish this!

Sunday, August 30, 2015

Progress on Projects

Do you ever get those feelings, of I can't move on to this or the next project until I finish or get so far on such and such.  Well that is were I have been with the Pink Princess.  I am not always sure if that means I am stalling on starting the next project or if that means the current project just needs to be done.  
Today I finally finished added the last borders and once I did that I was able to pull out what is left to do on my Dear Jane. 

So here is my Pink Princess.  I like how it looks. 


I cut the borders wrong, I cut two strips 4" and two 3.5 inches.   My plan was for 3.5" all the way around.  I just couldn't cut the 4" ones down so I left them at 4".  I put them on the top and bottom since a longer quilt never hurt and I knew I was going to have add on to the side borders and I had one piece left over that would give me two 3.5" pieces.  

When I added on the extra pieces for the side borders, one of the pieces had the words below, Her Royal Majesty, and one of my side borders did also.  So one border has that on it three times.  
It looks like I have a thread to clip.


The other side has Adorable on it in three places. It was so cute I was thinking about changing the name of the quilt to Adorable.  
I am going to quilt this on my frame.


So after this I pulled out all my DJ stuff, except for the backing, and binding.


I went through all my triangles to see which ones are missing, I need to make four and I need to make 2 corners. 
I am not sure why I stopped so close to the end.  I think I got a little intimidated by constructing the borders and 
having it all fit together. 

Here is center of the quilt has it has been since, 2002 or 2003.


Is is part of the top row. 


The other part of the top row.


The bottom row of triangles, all of the pieced triangles are done. 


Left side and right side triangles, each border is missing two triangles. One triangle on the right side border is missing a little triangle, but I think I left it off since the print I had used was cool by itself, as it has a large flower right in the center. I might leave it that way.  After all it is my quilt. 


I have to pick out fabric for all those plain triangles.  Grrrr 

Tuesday, August 18, 2015

Get RR Done #4

Well this project is really #3 and it was due last week.  It isn't done.  I was working on it last week when I realized I didn't have enough of my main fabric.  It is a Crafty class, called Pattern Free Quilt Design.  I was opening it would help me be a little freer with design.  No such luck, it actually made me a little crazy.  I made six blocks and I was like how do you cut it any size you want. I finally had to come up with a plan, cut one 2.5" another 3.5" and another 4.5".  I think I even made one 5".  That is the size of the coordinating fabric strips.  
Than I ran out of fabric.  I followed the instructions which weren't very clear, and very vague. I purchased my one yard of each fabric.  I am sure there would have been and easier way to cut the fabric and have the same results. 
So I finally drafted the quilt in EQ7 and changed it around and I am much happier.  I just need a little plan to the quilt.  The quilt is supposed to be 6 x 6 block layout but since I ran out of fabric, I decided to make it a 5 x 7 block layout.  Than I only needed end strips for 8 blocks instead of 9 blocks.
I went to the Get RR Done group and asked a couple of my friends what they would do.  I had enough scraps to piece four more edges, but I would still be short four edges.  Try to find a fabric that matched or bring in another color.  Of course the fabric I had is gone, since I purchased it three years ago. 
So I found a fabric that we all liked. 
I came home, cut some fabric and did some sewing. 

This is what I came up with. 

 It just doesn't thrill me. I actually don't like it.  The gray just sticks out and looks out of place.  Like oops I made a mistake. 

This is my second arrangement and I like this one a little better. 


I do have 8 strips of the dark pink and lots of the white with words, I just might make some strips of that and replace the gray.  The picture of the class sample had some blocks like that, so it might work.  So stay tune for updates.

I did find a nice dark raspberry for a resting border and binding and I have enough of the white with words on it for a small border. 

I was going to make this for Little Bit but my nephew's girlfriend had a baby girl so I thought I would give it to them. 

The next project due is the borders on the Dear Jane Quilt.  

Tuesday, July 21, 2015

Project # 3 is Done!!


I finished the Stick Santa on Sunday evening.  Monday was a busy day and us three girls went up to Payson AZ to visit with Mr. B. overnight.  He is working up there for two or three days for three weeks.  So today, Tuesday is my first day back to my computer. 

Remember my mistake that I had made Santa too tall.  
Well here is my solution and it worked great. 


It looks like the Leaning Tower of Pisa in this picture 
but it really is straight.  I added a cleaned out soup can to the top.
I had to soak that can in vinegar water over night to 
get the chicken soup smell out. 


Here is a close up.  The blue tape was used to hold the can in place, than I used packing tape to make it very stable.  


Here he is!!


Here is a close up of his face. So cute and I am glad he is done!

Below is the progress I have made on Little Bit's stocking.  This seems to be taking forever! I know it isn't but it just seems that way.  I am loosing hope that they will be done in time to be made them into stockings for Christmas, but it will be what it will be and I will just keep plugging away.  


Saturday, July 11, 2015

Started My Third Get RR Done Project

Yup I am working on this project and I was on a roll!!
I cut out my squares.  I started with the Non Red Squares first.  I sewed the half square triangles together. 


Then I cut out most of the red squares.  I left about 100 to do after I had some of them laid out. Just in case I wanted more or less of a color.  I used 12 different reds.  


The top half is done!


The bottom half in progress.


All Quilted.


Close up of the quilting.  I tried to do free motion quilting on it but the seams with the interfacing grid behind the top made it too hard to make good shapes.  So I when with my cross hatch.  Yes, I used my favorite iridescent thread again.


So I was merrily thinking I just need to sew the eyes on and sew the seams closed and I can be done soon.  A quilting friend came over today and I was showing her how he would look on the tube.  I thought his face was a little high.  It was at the very top of the tube and part of it was above the tube. 
So I went to the pattern and counted the rows of red, I counted the rows of red on my piece.  Guess what I have two extra rows of red.  No wonder he is so long looking.   
You may be wondering how I made this mistake. I drafted my Stick Santa in EQ7, and I must have added the extra rows in there. I didn't count all the rows, I just counted to the white trim on his hat and face and then just filled in the rest with red and I went by how long it was suppose to be. 
So I have to decide what I am going to do.   
Can I buy a longer mailing tube?  
Could I just turn up his boots? But then he would 
have very short boots.
Can I tape something like a empty veggie can to the top of the tube I have?  It would have to be very secure so it doesn't fall over. 
Should I take it apart and remove the two extra rows, they are at the bottom of the top. 
That sounds like a lot of work. 
I just went and tried the cans, a veggie can is too fat but a soup can is just right.  I am going to duct tape that sucker on and be done with it.  Now to get my little people to eat a can of soup.
I am so relieved I found a simple solution.  No one will know my Stick Santa is taller.  Well you guys do but you won't tell.  

Saturday, July 4, 2015

Second Project is Done!!!

I am so excited!  My second Get RR Done Project is DONE!  
And a head of schedule now I can start on the next project. 
Since I am also working this up as a class for my favorite quilt shop. I have also been working on the class project workup sheet, supply list and handouts at the same time.   


Here she is being basted!


Here she is quilted with her hair, eyes and her one tooth.


Here she is standing on her stick!


Close up of her face.


Close up of the quilting, where I started her spider web.  
I used iridescent thread. 
I feel relieved now that she is done.  One less thing to worry about.  I do have some tips for my students.  

Monday, June 22, 2015

Stitch Witch Progress

Well Thursday was my day!  I was at the Project Get RR Done meeting.  Since the project for the month was done, my name was entered into a drawing for a small prize, and I won it!  The prize was neon dots to label rows of blocks.  

Then we had the drawing for the next month project to be done for July, one gal asked for number 3 I asked for number 2.  Guess what number was drawn, yup number 2. Since I was already working on #2 and it need to be done by the 26th of July for the shop Meet and Greet, I was very happy.  

I checked my phone while at the group and my husband sent 
me an email and said to my wonderful wife in it.  
How sweet, he is a keeper. 

So here is project #2 The Stick Witch.


Here are all the fabric squares for the top half of the witch 
fused on and ready to sew the rows together.


Here she is with the horizontal rows sewed together.


And now the vertical rows.


Now the bottom half has all the fabric squares and just checking to be sure the colors are correct on the bottom and top rows. 


Reading instructions can be helpful, I found these instructions for this pattern a little lacking.  One tip I missed when I did the top was to stitch every other row.  I did it on the bottom and it really made it easier to press and sew.  After I sewed three rows I noticed I had my direction of seams messed up, so I had to do some ripping and I decided to press them in the right direction.  I found this helpful and did it for the rest of the bottom.  It also helped pressing the whole thing easier.  At least I learn from my mistakes. 


Top and bottom joined!
Now to sandwich and quilt her than do all the 
embellishments and close her up and put her on her tube. 

I am thinking of making this a two session class.  
Now to work out all the details and what homework 
the students need to do before each class.  
FYI
There are 280 black 1 3/8" squares in this witch!  

Happy Stitching!!!