I offered to teach a class on different ways to make Flying Geese. It is for newer quilters and I will also teach them how to use their rulers for cutting 45 degree angles. I found some fabric I really liked and started thinking about a layout.
 |
| Not my real fabrics |
Of course I played with some layouts in EQ7. I even scanned in my fabrics for a realistic look. Here is one of my first ideas. The problem was I liked both of my colored fabrics and I could not decide which one to use the most. So I was trying to go for balance of both colors. What a mistake that was.
 |
| First layout |
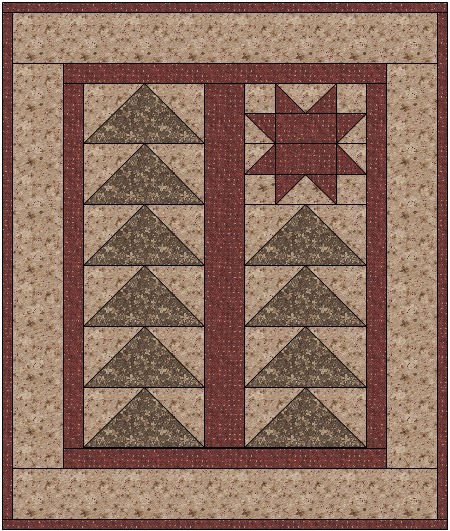
This is what kind of craziness you get when you cannot decide on colors. The next morning I woke up and had a great idea. So after work on Monday night I did some frog stitching and made more flying geese and a star.
 |
| Final Layout |
I planed it out in EQ7 and loved it right away. I named it Fly to the Star. The red geese I am just going to make a single strip hanging. No waste here.
Here it is all basted and ready for quilting. I have five different ways to make the flying geese. There are more ways then that but a couple of them are too strange for new quilters. Plus I won't want to use them myself so why teach them.
One of the fun techniques I am teaching are three dimensional. See the rulers tucked in the folds? Here is where I learned how to do the goose on the left. The one on the right I learned on the Dear Jane list many years ago, when I made a one inch star.
Now to go start the quilting!
On Sunday I also finished my Beyond the Basics EQ7 class handouts I will be teaching on the 5th. I have been a busy girl!
Happy Stitching!